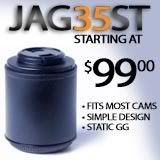
Quite often we get questions like:
- Why does my footage look different than yours?
- Am I doing something wrong?
- How can I improve my footage?
Well the most important advice we find ourselves giving is "practice, practice, practice". But along with practice having the right equipment makes a huge difference. So i will go over the best set up we have found to work using our most affordable dof adapter, the ST.
First what cameras work good:
The static adapter is offered with two mounting thread sizes 37mm and 43mm, this two sizes cover most of the consumer camcorders currently available, there are some 30mm, 46mm and 58mm threaded cameras out there and they can easily be set up to be used by using the right step ring. If you happen to have one of this cameras with threading other than 37 or 43 millimeters, just get a step ring that goes from your cameras thread size to 43mm and then purchase the 43mm threaded JAG35 adapter.
By far the most popular camera being used out there with our adapters is the Canon HV20/30/40, but we do get feedback from users that own the Hf cameras including the new HF-S10/100 and all of this models give good results with the JAG right out of the box as far sharpness and vignetting is concerned. Some models will require you to zoom in more than others to frame the GG correctly but for the most part all of them will give very little vignetting without an achromat, here is a sample shot by Brice Beasley using an HV40:
Now what lenses work good?
Because the Static is a non vibrating dof adapter, the grain on the GG will show up more often than the vibrating adapters. Lower light levels and slow lenses or high f-stops will cause the grain to show off. For this reason it is important that you use the fastest lens you can get your hands on and equally important is that you maintain the lens aperture open somewhere around the max aperture. I always recommend Canon FD lenses because they are the most affordable fast lenses on the planet. I bought a mint condition FD 50mm f1.2 on ebay for $130 not too long ago, and even though you wont find a deal like this every day this lenses (F1.2) do go for around $200-$300. On the other hand the Popular Canon FD 50mm f1.4 can be found on ebay for under $100 anyday and its performance is very close to the faster f1.2 lenses. This is the best price/performance ratio you'll get from a lens and I highly recommend it.
Other lenses that are highly recommended for the JAG35ST are the following :
- 24mm f1.4
- 50mm f1.8, f1.4, f1.2
- 85mm f1.8, f1.2
- 100mm f2.8
Choosing the right settings:
Having the right camera settings also has a huge impact on the images you get from your rig. You have to keep in mind that some of this equipment was never intended to be used in this way and you are going to run into its limitations sooner or later. People that understand and learn to work around this hurtles usually tend to get the best results from their 35mm adapter rigs. Here I'll discuss a few of the most important settings you will need.
Framing and Focusing - Focusing is a very critical part. Because you're dealing with shallow depth of field, the area of your frame in which things are in focus is very small and it can be very difficult to keep your subject in this small part of your frame. This is where the "Practice" part comes in and the more you do it the better you'll get at it. But the focusing I want to discuss now is not the kind that happens in front of the SLR lens but in the back. Lets think of a 35mm adapter like being a Big screen TV, the projection type, just like the tv is projecting an image to the back of the screen and its visible from the front, the 35mm SLR lens projects an image to one side of a glass ground screen and your camcorder sees it from the other side. So imagine that you want to record your favorite tv show using your camcorder set on a tripod a few feet in front of your tv. If you were to set your camcorder's focus to Manual and set it just a bit off from the screen, every scene of your favorite TV show will be just a bit off, not completely blurry but just not sharp. That is what we see in a lot of the 35mm test footage on vimeo and youtube. The camera needs to be precisely focused on that glass ground screen or all of your shots will be soft.
Here is the best way to focus your camera into the screen, I have found out that the HV cameras Auto focus works really good, after its set just change it to manual and your set. But not all cameras can do this, my HF-s10's auto focus does not do such a good job so you have to set it manually. Taking your SLR lens OFF point the front of the Dof adapter towards a light source and while looking a your LCD screen focus the camera until the grain becomes sharp.  Install your lens and check to see if you're zoom in enough to get past the vignette if you are you are done, if you see darker corners on your frame. Make sure your SLR lens is fully open then zoom in until frame in evenly lit, then re-focus on the screen making sure the grain is sharp.
 Install your lens and check to see if you're zoom in enough to get past the vignette if you are you are done, if you see darker corners on your frame. Make sure your SLR lens is fully open then zoom in until frame in evenly lit, then re-focus on the screen making sure the grain is sharp.
- Jehu


6 comments:
really good updates on your site, I'm still practicing with my jag35st but this little hints helped me a lot, I guess we all share the same problems when we are so eager to get good shots. I have an hv30 and its auto focus is really good, so I use the method you showed, first auto to get the gg properl, then manual... one little question, would an achromat be a must or could I live without it? lol
thx a bunch for creating an affordable, good quality dof man
Great information, thank you!!
I am using a Canon Vixia HG20, JAG35Pro Shrigg, 7" monitor, ShriggRig with 18" Carbon Rail from Indifocus.com, Rode AVM and 12' boom, Davis & Sanford fluid head and tripod and Sima LED lights.
I am diggin it... but now my issue what are good setting using a 50mm 1.8 in a dimmly lit dining room. I am getting a ton of noise and the auto settings are non so hot.
If you have some HG20 tips, I would greatly appreciate them.
Best,
terbs
- Thanks to the Jag35 Crew for great products, great prices and great support!!
I sent this thru an email, but I figured I'd post it here, so others might benefit from it.
The HG20 is known for needing a ton of light, it doesn't do well under low-light situations, now adding a lens adapter to it makes even good low light cameras struggle with light. So in your case, you will need a lot more light to get decent shots.
The other thing, a faster lens will definitely be helpful, we use a f1.2 or f1.4 which would be better for that camera that's already loosing a lot of light. Also, be sure that your lens aperture is open all the way. You will need to mount it to your SLR camera to adjust it.
The other thing I can suggest, is locking your gain at zero, so you don't have the camera auto-compensate for low light, so instead of havin' the camera try to make it brighter digitally, just lock your gain. You can do this in the canon cameras, by using the preset mode of Spotlight, look for it in your menu. While shooting in spotlight, your gain will be locked at zero, so you won't be getting the gain, but you will need a whole lot more lighting, this will force you to light things correctly, with plenty of light.
I stumbled on this entry from doing a Google search after producing some disappointing footage from my static adapter, but after reading through this and following directions I finally achieved great quality and amazing shallow DOF. Guess I initially set it up wrong (didn't have the SLR lens fully open) and didn't have proper settings on the camcorder. Hardly any grain and no more vignetting!
I KNEW it wasn't the adapter after seeing beautiful footage from other people with my exact setup.
Thanks for writing this up! Helped a ton!
Now I feel silly asking this but I'm a newbie to video making but am totally in love with it. The question is; that you explain very well about focusing on the screen during the initial setup. I get that. What I don't get is that if you need to be focused on the grain, how would you focus on the subject and change focusing on various subjects? That's the part I don't get. Hope I make sense. My lack of shop talk is still maturing. Thanks
Well the focusing of the grain is done with the camcorders lens, then that stays locked, so from then on all focusing happens on the slr lens. so you have to turn the slr lens focus ring for focusing.
Post a Comment
Post a Comment
Leave a Message